Access the DNS Zone Editor
- Log in to your Plesk Onyx account.
- Click on the Websites & Domains menu.
- Click on the DNS settings link.
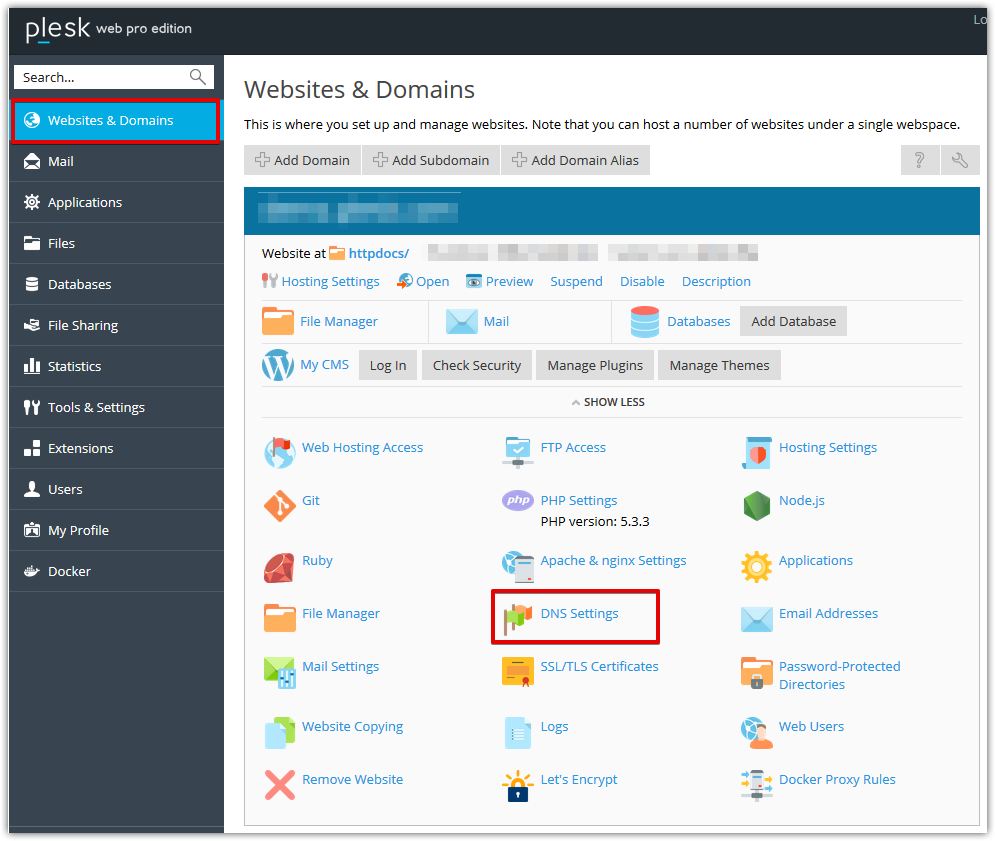
- You are now on the DNS editor area.

Back to top
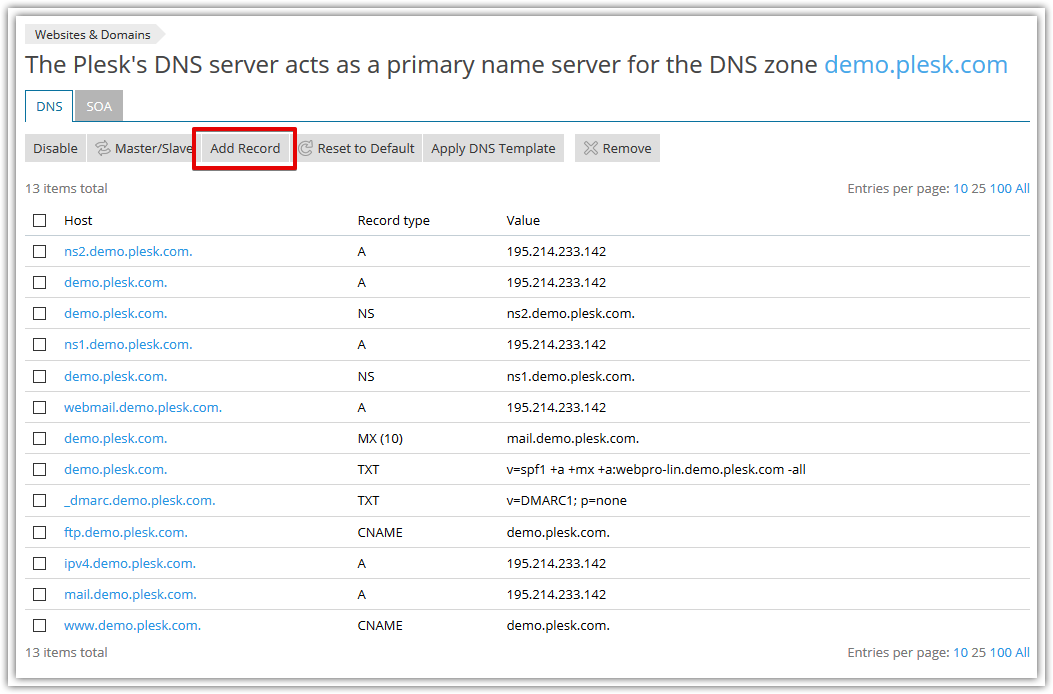
Create a SPF record
- Click on the Add Record button.
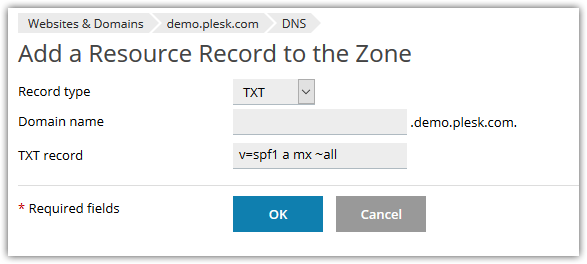
- Record type: Select the TXT record type.
- Domain name: Enter your subdomain name or leave that field empty to apply it on your main domain name.
- TXT record: Enter here your SPF record ( v=spf1 a mx ~all )
- Click on the OK button to create the record.
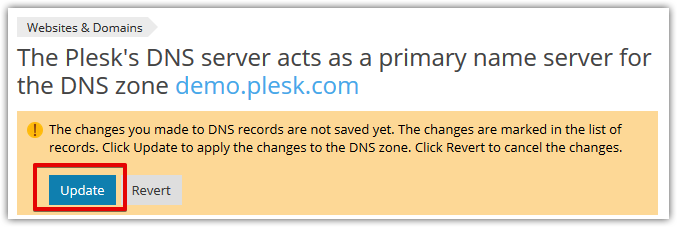
- Once added, you will see a confirmation message, click on the Update button to confirm the DNS modification.
Back to top