Access the DNS Manager
- Log in to your LWS panel.
- Click on the domain you want to modify.
- Under Domain name header, click on Domain management.
- Click on DNS zone management for domain name.
Back to top
Create a SPF record
- Go to Complex zone addition
- In Record type dropdown, select TXT/SPF
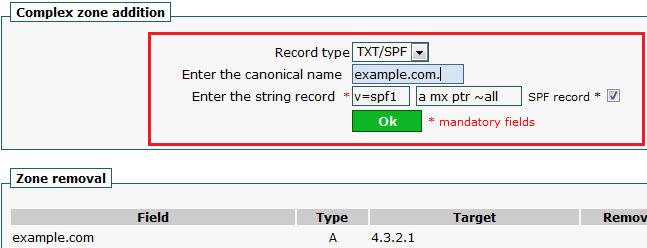
- In Enter the canonical name, enter your domain name or subdomain (e.g. mail.example.com. if your email address looks like contact@mail.example.com).
Do not forget the final dot.
- Next to Enter the string record, enter v=spf1, then your SPF data (e.g. a mx ~) and finally check SPF record checkbox.
- Save your modifications.
Back to top