Access the DNS Zone Editor
- Log in to your ISPConfig account.
- Click on the DNS menu.
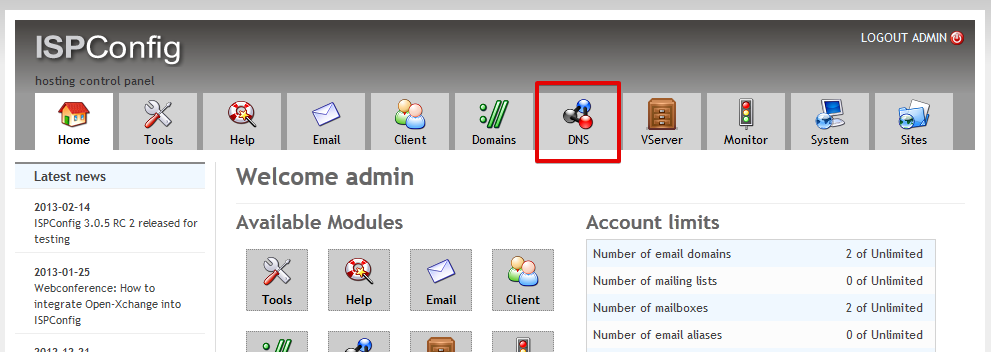
- Click on one of your domain name to edit its DNS.
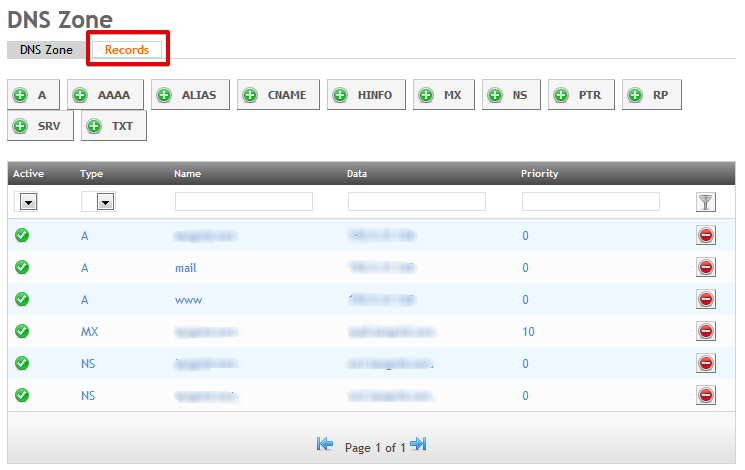
- Click on the Records menu to access the DNS area.
Back to top
Create a SPF record
- Click on the TXT button to add a new TXT record.
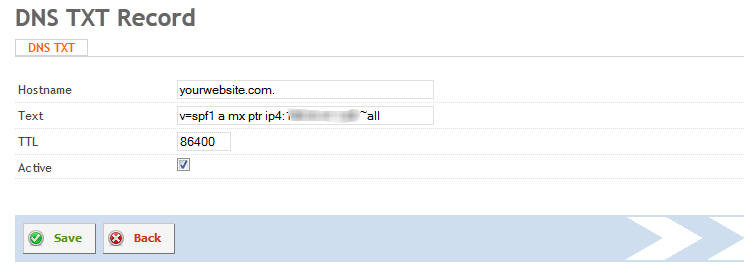
- Hostname : Enter your main domain name or subdomain.
Don't forget to add a dot at the end of your domain name! (example: yourwebsite.com.)
- Text : Enter your SPF record.
- TTL : Leave the default option (86400).
- Active : Make sure the checkbox is enabled.
- Click on the Save button.
Back to top