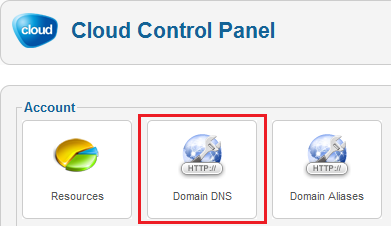
Access the DNS Manager
- Log-in to your website back-end.
- Go to Cloud Control Panel

- Click on Domain DNS.
You may have to contact CloudAccess.net support to enable this interface.
Back to top
Create a SPF record
- Click to the New (+) button on the top left corner of the window, or select an existing record and edit it.

- Under Name, enter your domain name or subdomain (e.g. mail.example.com if your email address looks like [email protected]).
- In Type dropdown, select TXT.
- In the Content field, enter your SPF record (e.g. v=spf1 a mx ~all).
Do not enclose your text in quotes.
- Fill Priority and TTL fields.
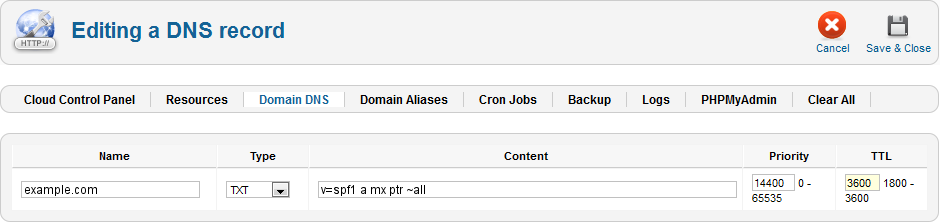
- Save your changes.
Back to top